The Foundation Knot
Today we have a very simple knot: what we call the Foundation knot or Basic Figure 8. This is the most basic knot of the Figure 8 Family of knots (Figure 8 knots are a group of knots that all end up looking something like the number 8). Figure 8 knots are used all the time in the vertical environment and we will be covering at least five different knots in the Figure 8 family.
Figure 8 knots are widely used because they:
- Are an inherently tight knot – meaning they are unlikely to become loose and inadvertently untied as a result of repeated loading/unloading
- Are easily identifiable – they look just like a number 8
- Are strong – the large bends of the knot reduce the stress on the rope itself (more stress from the bends in the knot means less stress from the load is needed to reach the breaking strength of the rope)
- Are easy to untie after loading – though the knot is inherently tight, the large bends make it easy to untie
We call this knot the Foundation knot because it serves as the foundation for two Figure 8 varieties – the Figure 8 Follow Through and Figure 8 Bend. Plus, if you know how to tie the Foundation knot, you basically know how to tie the Single Loop Figure 8 – the most used Figure 8 variation.
We primarily use the Foundation knot near the end of our rappelling line – a few feet from the end. Of course, you should see that your rope has reached a safe landing, but sometimes that isn’t possible. If the rope wasn’t properly measured it is nice to have this knot as a warning instead of rappelling off the end of your rope. In this application, the knot is sometimes referred to as the Stopper knot.
To start, place the working end of the knot over one hand. Then, all you need to remember to tie this knot is twist once, twist twice, pull through. That’s your first mantra and it is used for four other Figure 8 variations, so learn it well.
If you don’t quite remember how to tie this knot (or haven’t taken one of our classes) see below for more detailed instructions.
As we’ve already mentioned, the Foundation knot is the most basic knot of the Figure 8 family. Though it’s not the most used knot of the Figure 8 family, we start with this knot because it’s so simple and provides an easy way to teach our particular method for tying Figure 8 knots.
We believe this method (described and illustrated below) is the best for tying Figure 8 knots. The major benefit of this method is that it uses your support hand (i.e. weak or non-dominant hand) as a reference point so that you don’t have to look to see what you’re doing. More importantly, your support hand will also help ensure that you consistently tie this knot correctly every time – as opposed to some other methods where you can get an extra loop (or miss a loop) if you’re not paying attention.
One last thing, if you’ve never taken one of our classes you may not know our background – namely that we all have extensive experience in firearms training and some of the terminology has crept its way in. So, when we say “firing hand” we are referring to your dominant or strong hand. Conversely, your “support hand” is your non-dominant or weak hand. We use this terminology instead of right/left to avoid confusion with right- and left-handed people.
Tying the Foundation Knot
For this knot, take one of your 8-10 ft sections of rope and follow along:
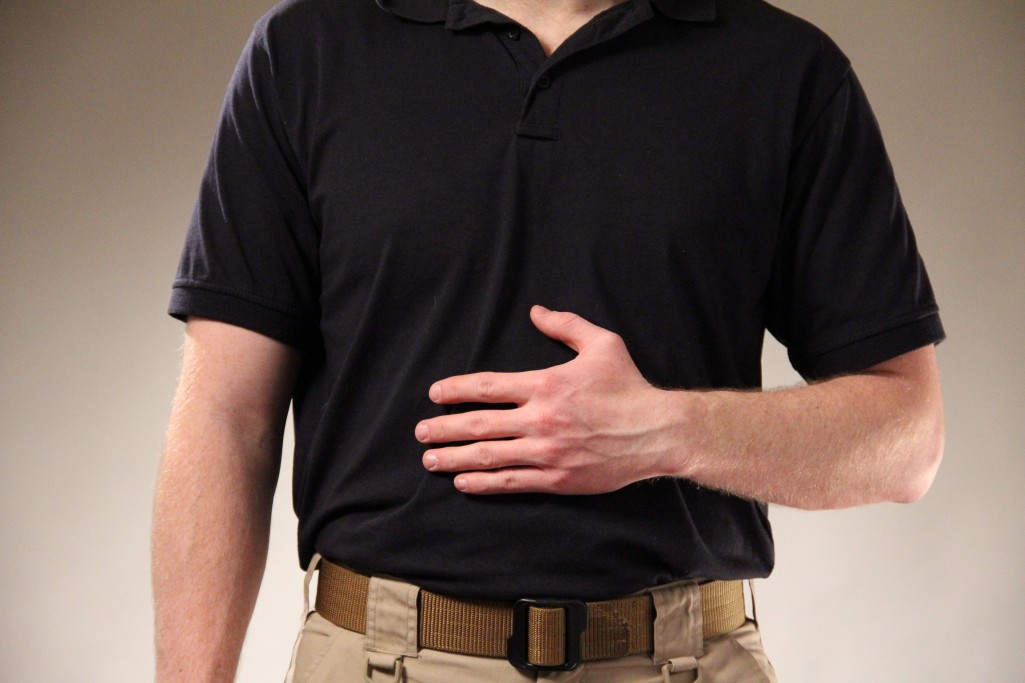
1. Begin by placing your support hand in front of you with your palm facing your midsection and thumb pointed up.
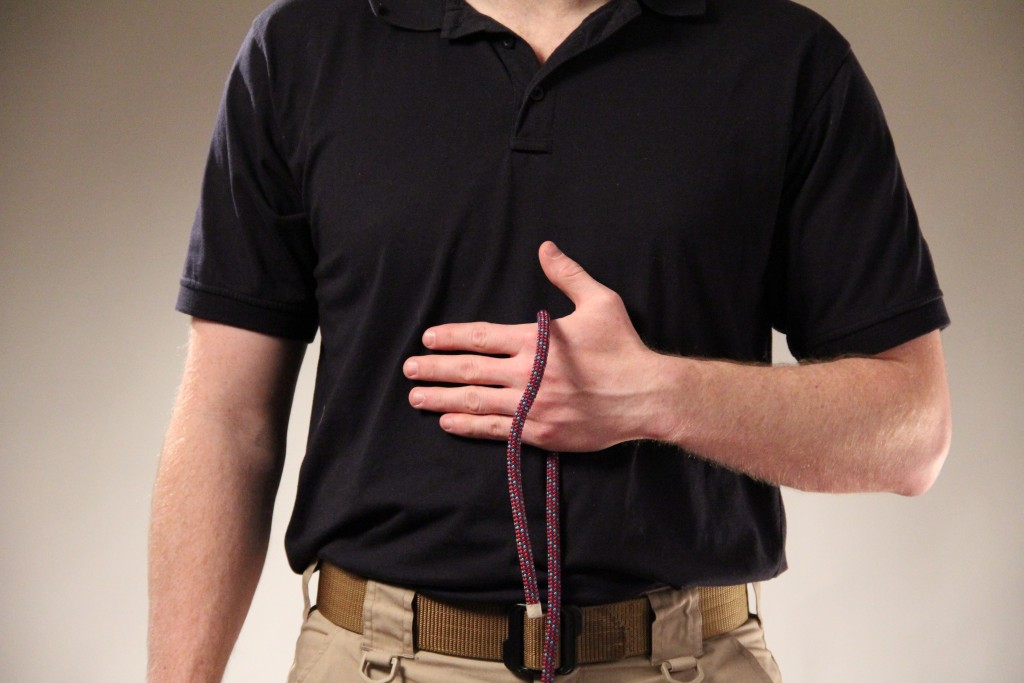
2. Place the working end of the rope over your hand so that a couple of feet of working end is on the outside of your hand and the standing end is running between your hand and midsection.
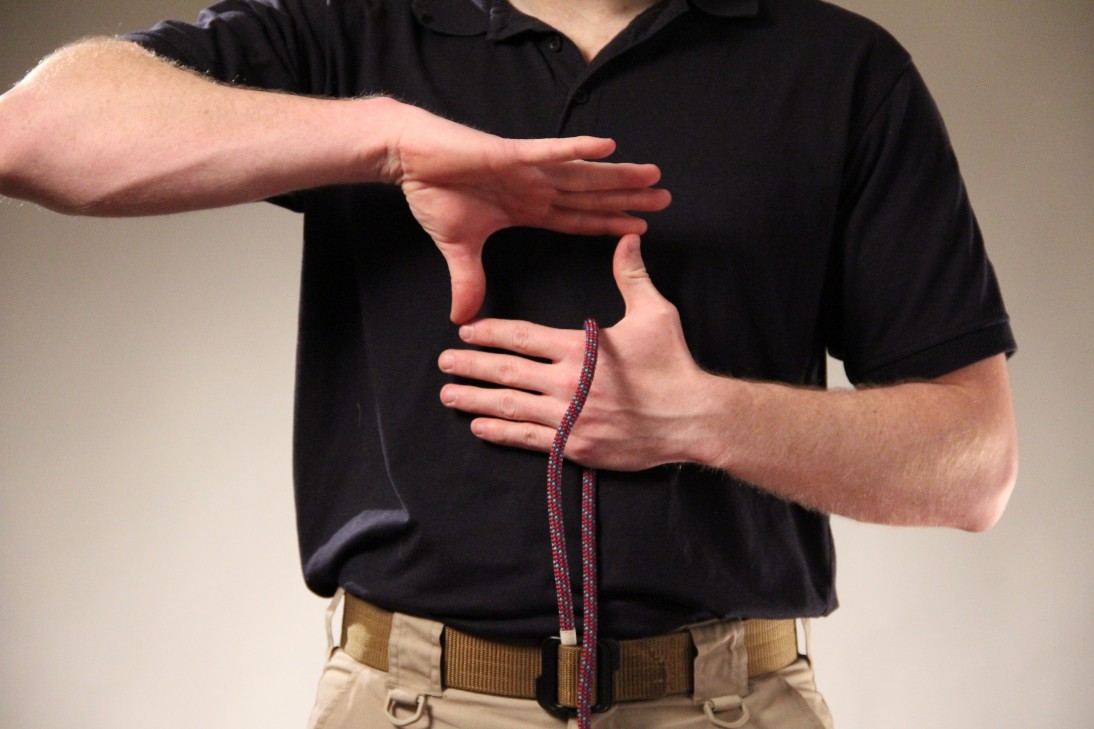
3. Take your firing hand and make a square, touching fingers to thumbs, with your firing hand palm facing out.
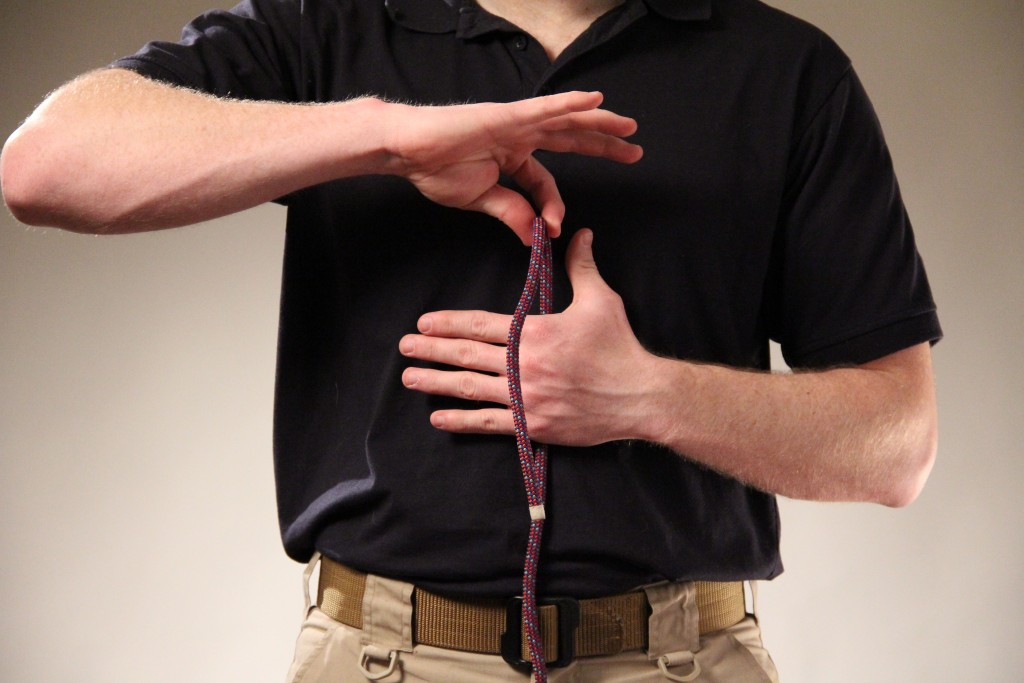
4. Using your firing hand, pinch the rope at the top of your hand and lift the rope two or three inches – notice, you have created a bight of rope with your support hand in the middle.
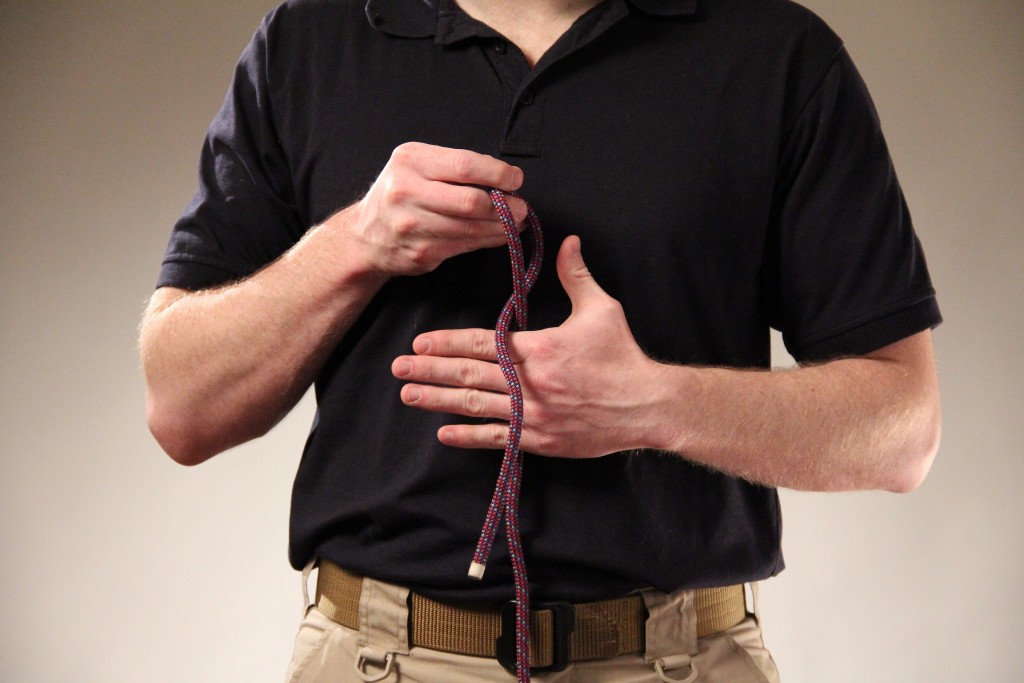
5. Using your firing hand, twist the bight of rope once until you have created a single loop of rope – your support hand should prevent the working end from coming around your hand.
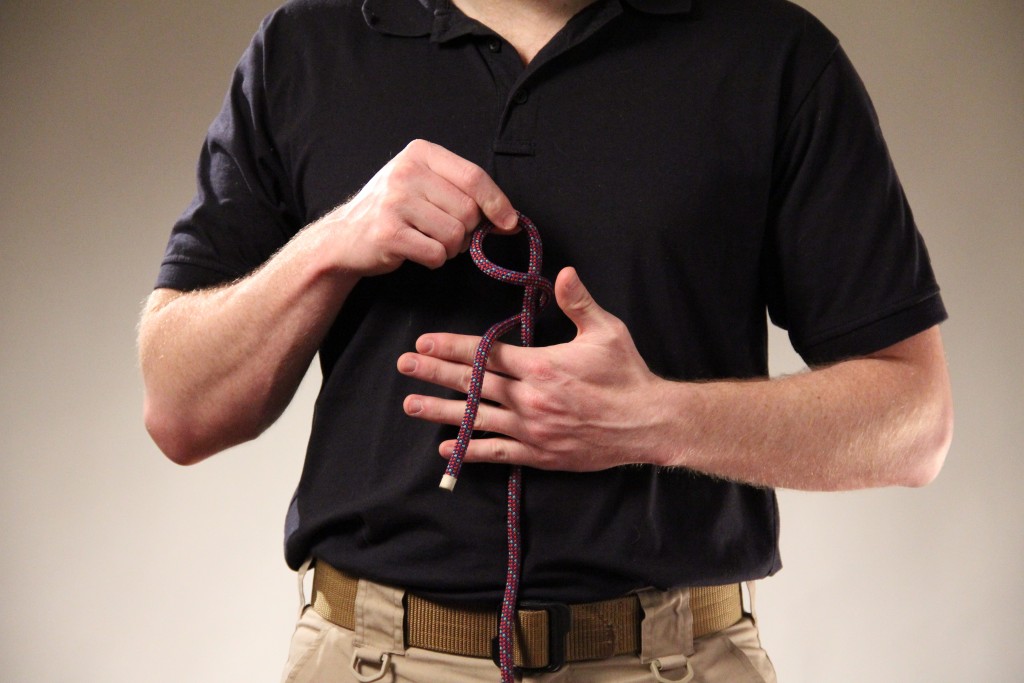
6. Using your firing hand, twist the bight of rope again – it should now look like you have two loops (one on top of another) or almost a number 8.
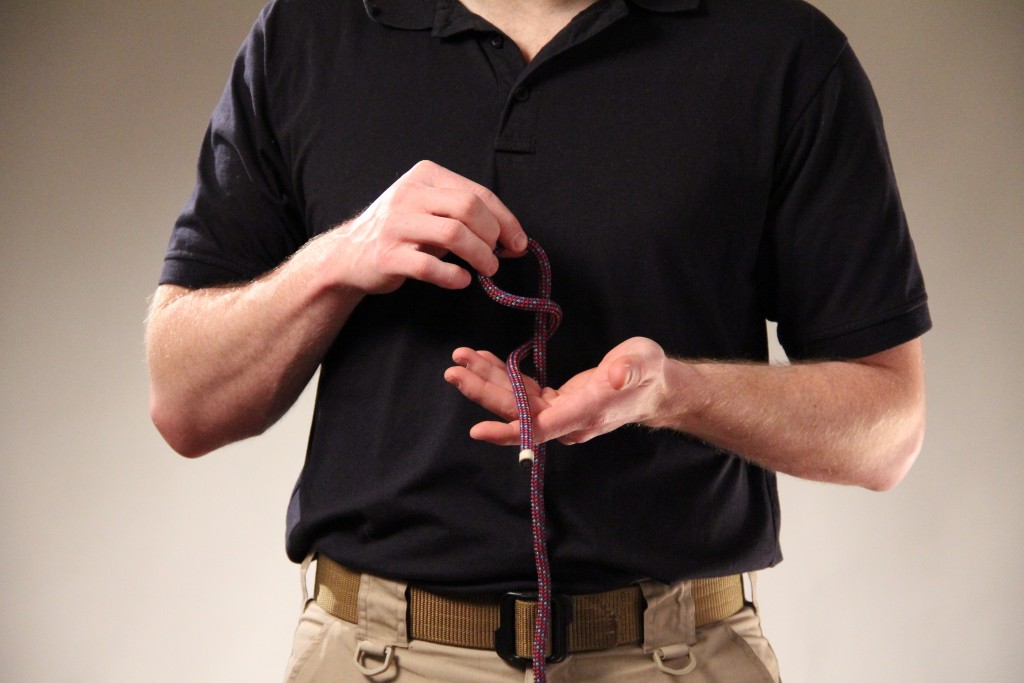
7. Turn your support hand over, grab the working end of the rope.
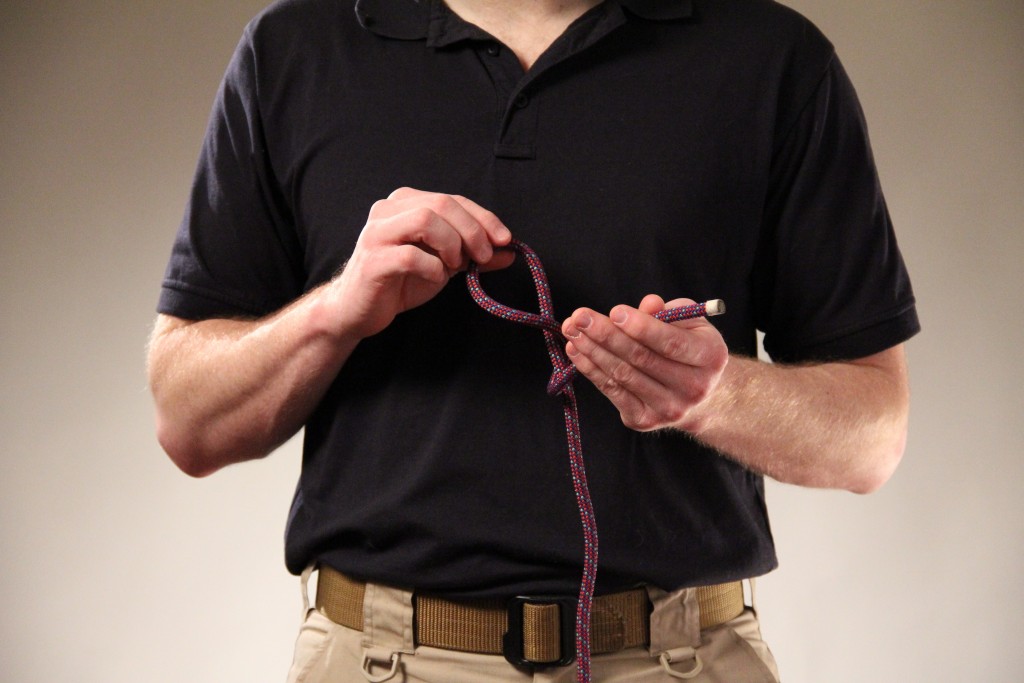
8. Bring the working end up along side the 8 that you just created.
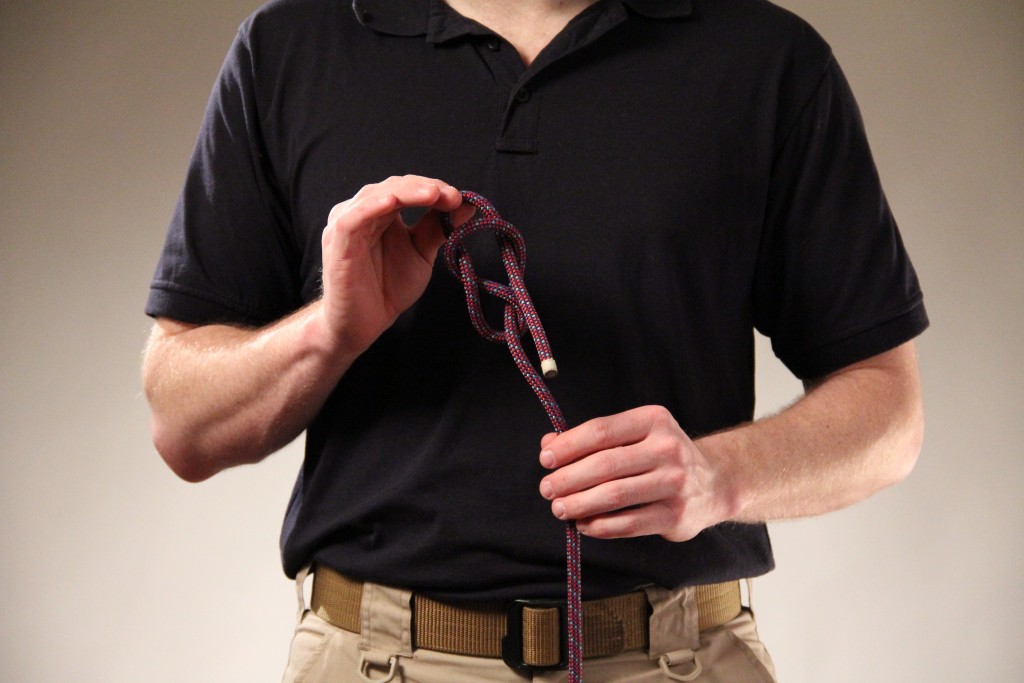
9. Start the working end through the top loop with your support hand and pull the entire working end through with your firing hand.
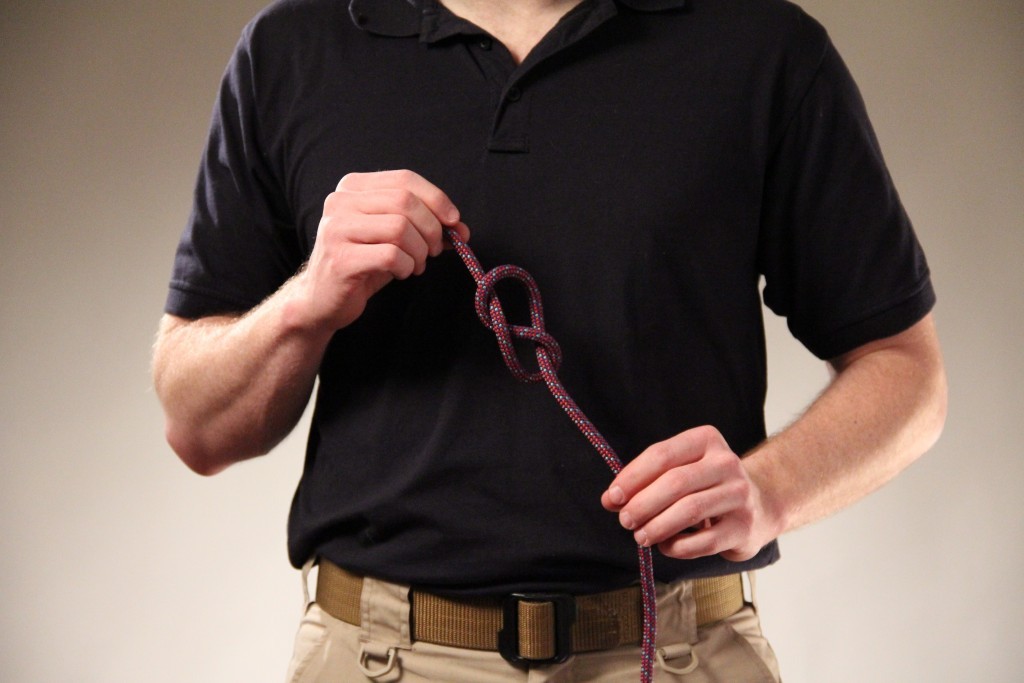
The finished product.
If the description above seems a bit wordy, we apologize. We hope that the pictures illustrate what our words can’t quite describe. Some of the steps may seem a bit quirky, but trust us, they’re necessary for this method. Next time, we will be using a nearly identical process and will give more of the reasons behind the process. Here’s a quick video to show you the whole process:
Ultimately, though, we use a mantra to help remember what are the truly essential steps of this technique. What we want you to remember is: twist once, twist twice, pull through. If you can remember those six words, you should be able to tie this knot.
Common Mistakes
You should now be holding the Foundation knot in your hands. You know you’ve done it correctly when it looks a lot like the number 8. However, we see a couple of typical problems:
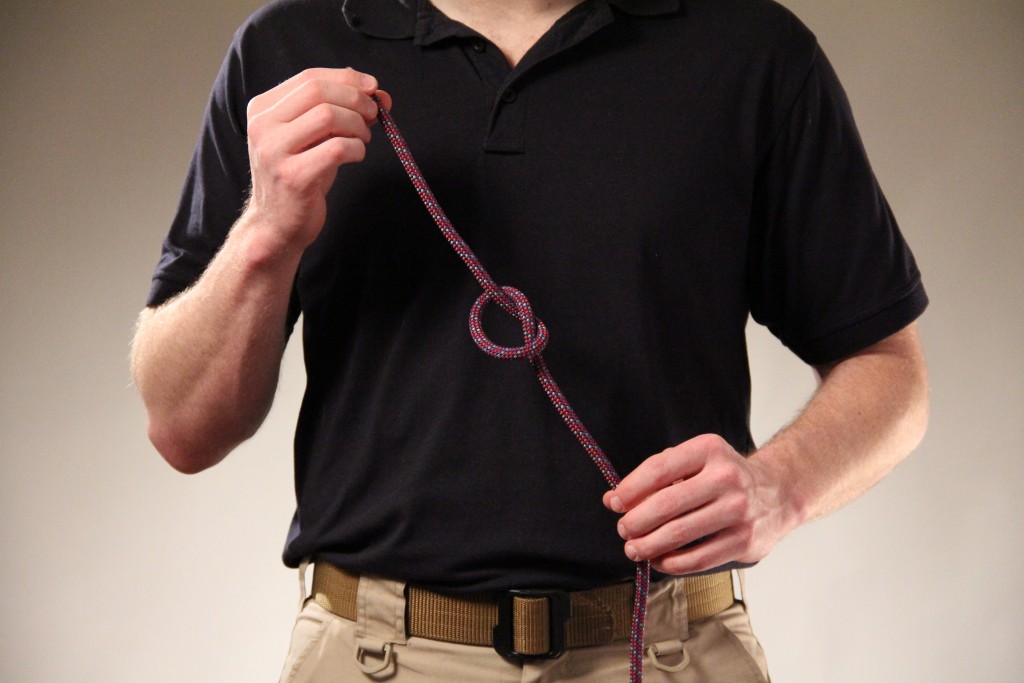
1. If it looks just like pretzel, that means that you didn’t twist twice. This is called an Overhand knot.
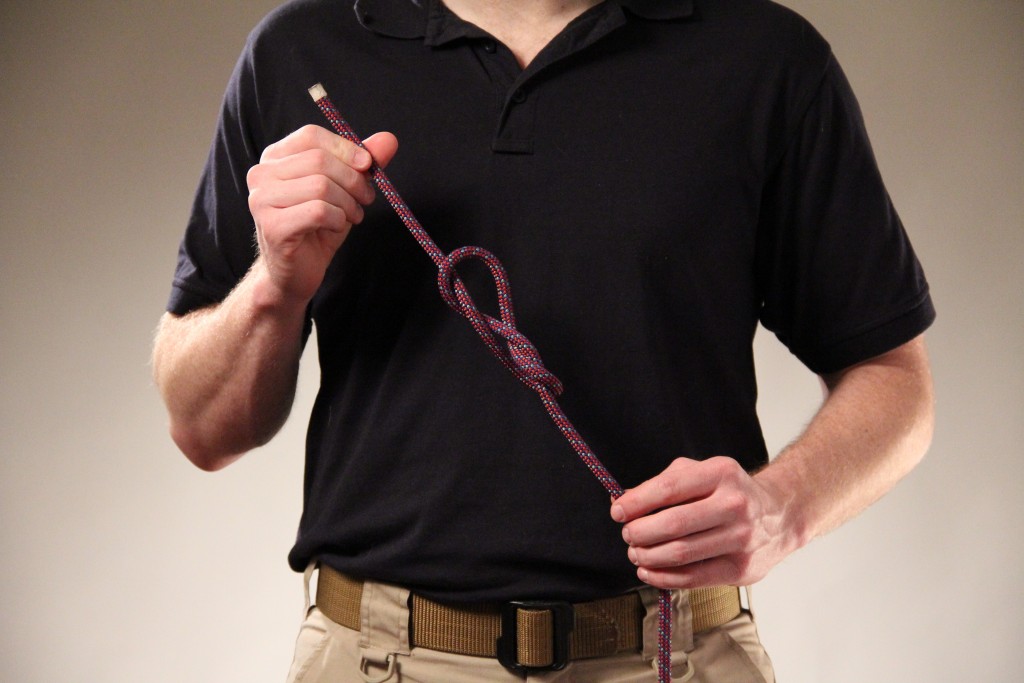
2. If it looks like there is an extra twist in your 8, that means that you twisted it three times. This is actually called a Figure 9 knot.
Practice, Practice, Practice
After you’ve tied it a few times, tie it again. The goal is to tie this dozens if not hundreds of times so that it becomes second nature. Make sure that you memorize and use the mantra (twist once, twist twice, pull through) as you tie the knot. Again, if you can remember those six words, you should be able to tie this knot.
All images and video courtesy of Denver Film & Digital.

